


Having
struggled to find any skirts that were suitable for work whilst out
shopping last week, I thought I would make my own. This way I could make
it the perfect length for work and in my choice of cute summery fabric.
I
used about a meter and half of this stripy floral cotton I picked up a
few weeks ago from Oak Mount Mill in Burnley. I really liked it at the
time but wasn't sure what I want to make with, now I think its prefect
for this type of summery pleated skirt.
I got the idea from my favourite sewing book, Tilly and the Buttons, available here,
to make a 'no pattern' flared skirt. She calls it the Clemence skirt,
but there is no pattern and you can easily make this skirt from two
large squares of paper and a waistband. So its easy to adjust and tailor
to your shape and taste.

Here's how I made this summer pleated skirt..
I measured my waist, hips and how long I wanted my skirt to be from my waist. I then made my pattern from brown paper using these measurements.
Front
Width = half my hip measurement plus seam allowance
Length = length of skirt from waist plus seam allowance
This is placed on the fold of the fabric
Back
Same as front just add seam allowances to both ends and cut two pieces away from the fold.
Waistband
Waist measurement halved and placed on fold.
(I cut the waistband so the stripes ran in the opposite direction to the skirt)


After pinning and cutting out the squares I placed right sides together and sewed down the sides seams, leaving the back open to insert the zip.
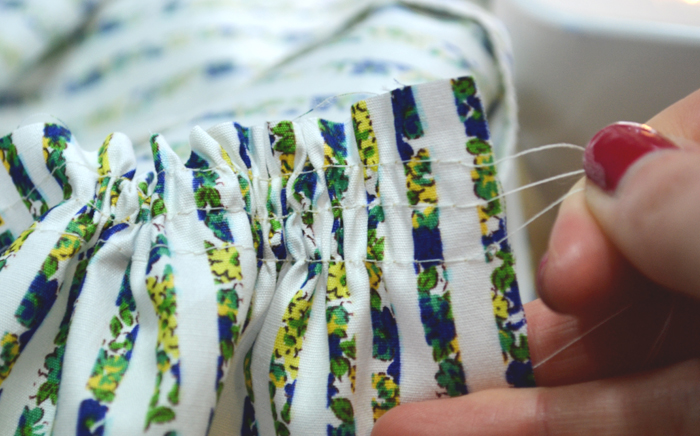
The Pleats
I created the beautiful full pleats by gathering the top edge, pulling three running stitches until it fitted the waist band. I then pinned it to my waistband with right sides facing.


The zip
I find the easiest way to insert a zip is by sewing it facing up towards you and using a zipper foot. It isn't completely invisible but has a tidy little flap on each side. I started on the right side of the zip, opening it up and getting as close to the teeth as possible. Once at the bottom I released my foot, pinned the left side and closed the zip before sewing down the left side.
I then sewed the remaining back seam from the bottom.


All that was left to do then was hand sew the waist band to the inside, attach a hook and eye and hem it to the right length. As this skirt was made from straight rectangles it was easy to just turn the hem up an equal amount all the way around to enure an even hem. Easy!
I completed this skirt in just a few hours over a few nights. The style is really easy to wear as well, I think I might have to make more in different prints as I love it so much!


I would love to know your thoughts or hear if you have made anything similar.
What is your favourite summer print?
Thanks for reading!

No comments
Post a Comment